How to consolidate all AWS accounts and enforce unified restrictions with AWS Organizations
Managing multiple accounts and resources can become increasingly complex as your AWS environment grows and scales. On February 27, 2017, AWS launched Organizations, which became widely popular across many business types and sizes...
Managing multiple accounts and resources can become increasingly complex as your AWS environment grows and scales. On February 27, 2017, AWS launched Organizations, which became widely popular across many business types and sizes. If you are still not using it, please consider it.
This powerful tool empowers you to define central configurations, security mechanisms, and audit requirements across your entire organization. With AWS Organizations, you can simplify resource sharing, consolidate billing, and enforce consistent policies, ensuring that your AWS environment remains secure, compliant, and cost-effective.
In this article, we will learn how to use AWS Organizations. We will explore how to create and manage OUs and accounts and apply policies to enforce governance.
Create organization
1) Sign in to the AWS console as admin of the account you'd like to make a management account. For example, let's call it A1.
2) Open the "AWS Organization" console in the top right menu.
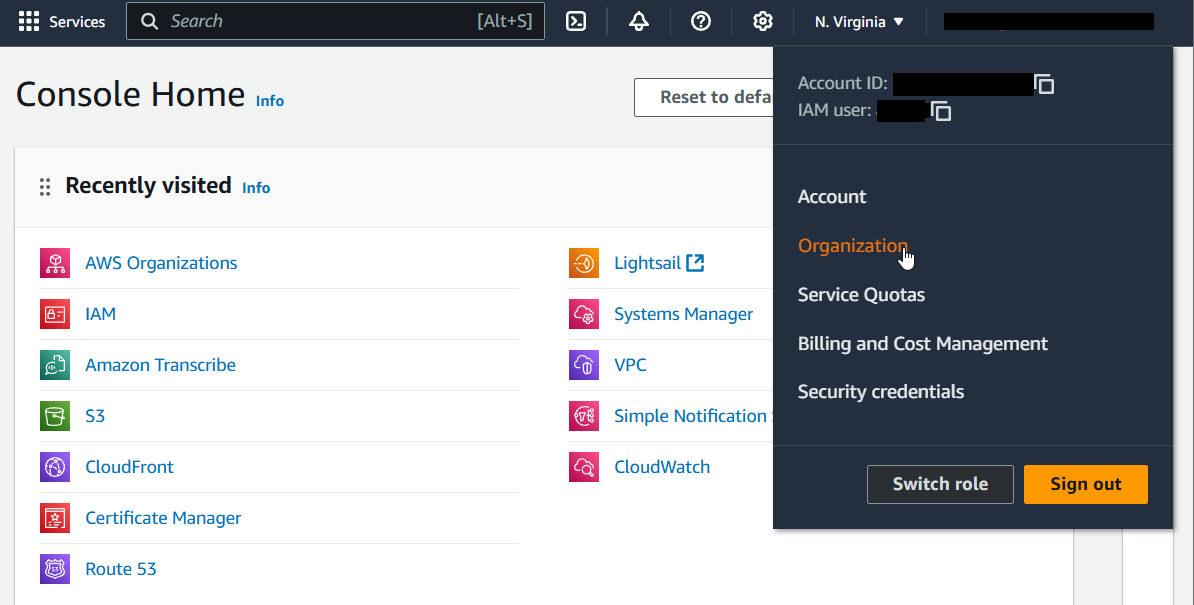
3) Click on "Create an organization".
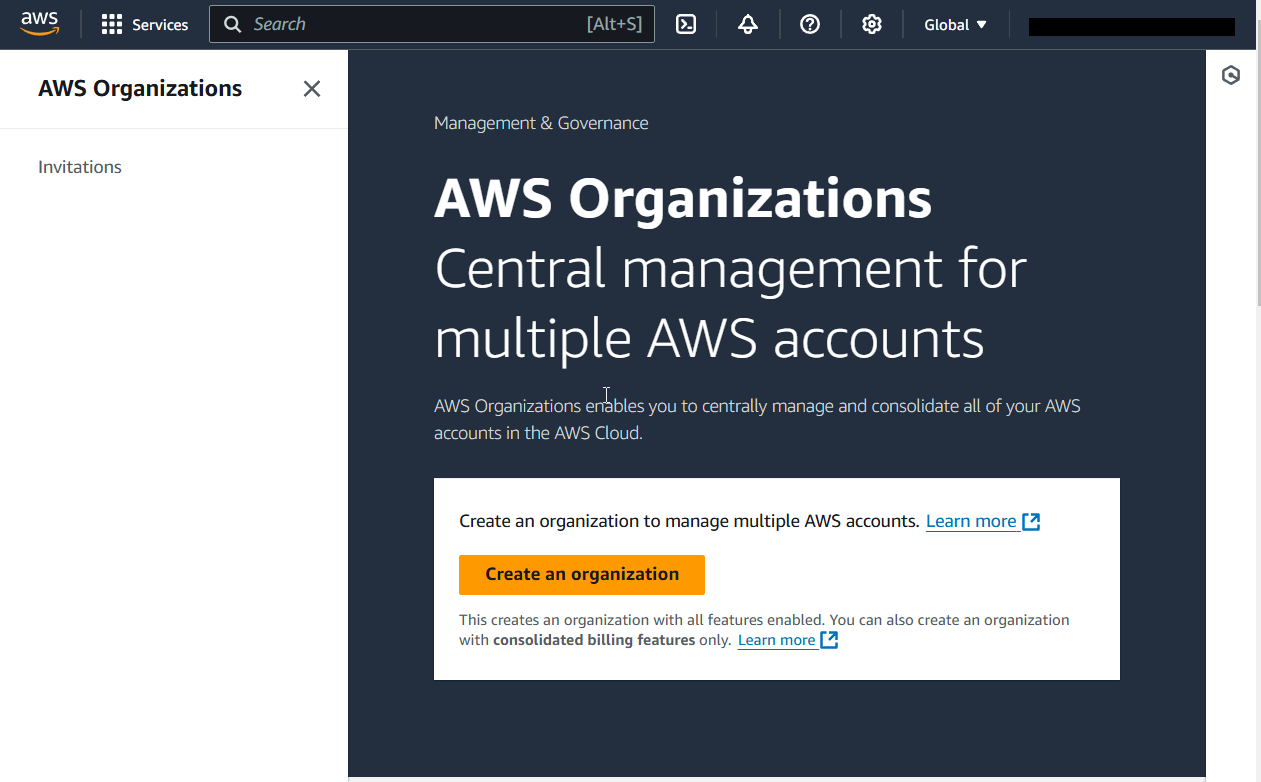
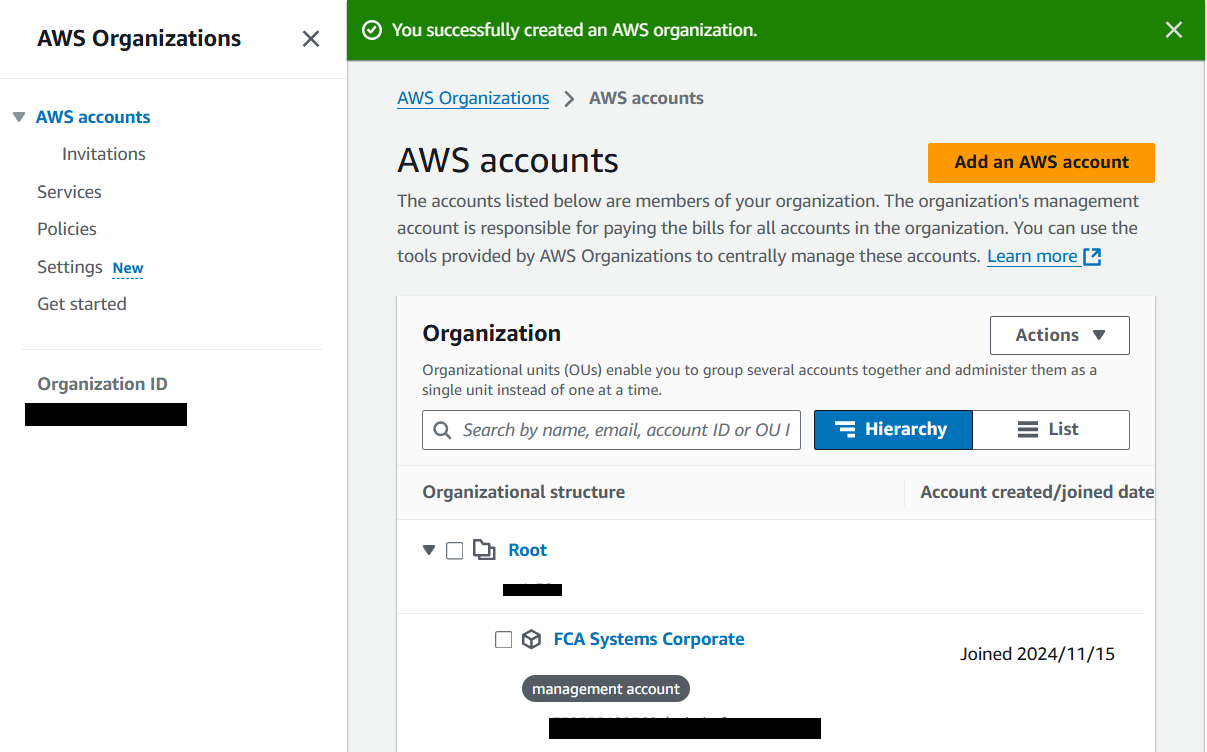
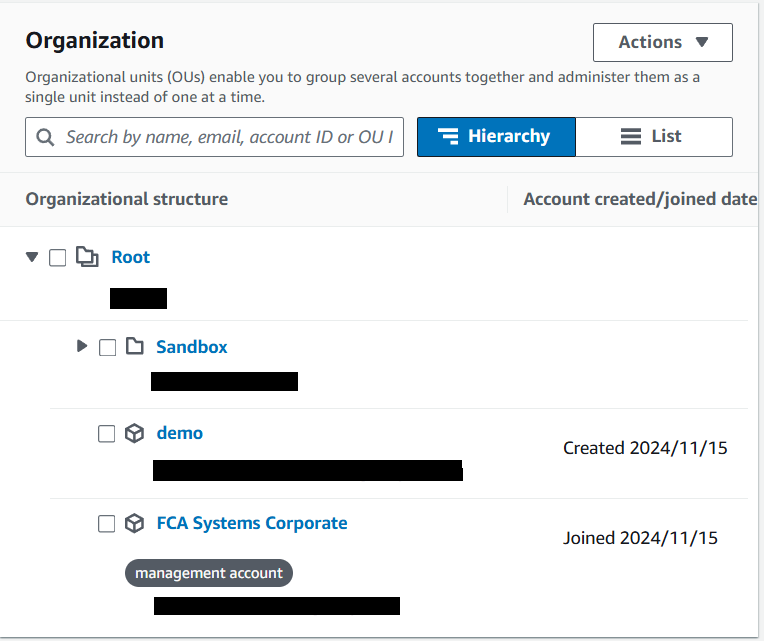
4) This operation usually takes less than a few seconds. You now have an organization with your account as its only member. A1 account became a management account and a child of your Root.
Now, you have two options: create or add a member account. If you want to add, skip the next section.
Create a member account (option 1)
5) Click on "Add an AWS account".
6) Make sure that "Create an AWS account" is selected.
7) Type your desired new account name, the owner's email address, and the IAM role name. This role enables you to access the new member account when signed in as an IAM user in the management account.
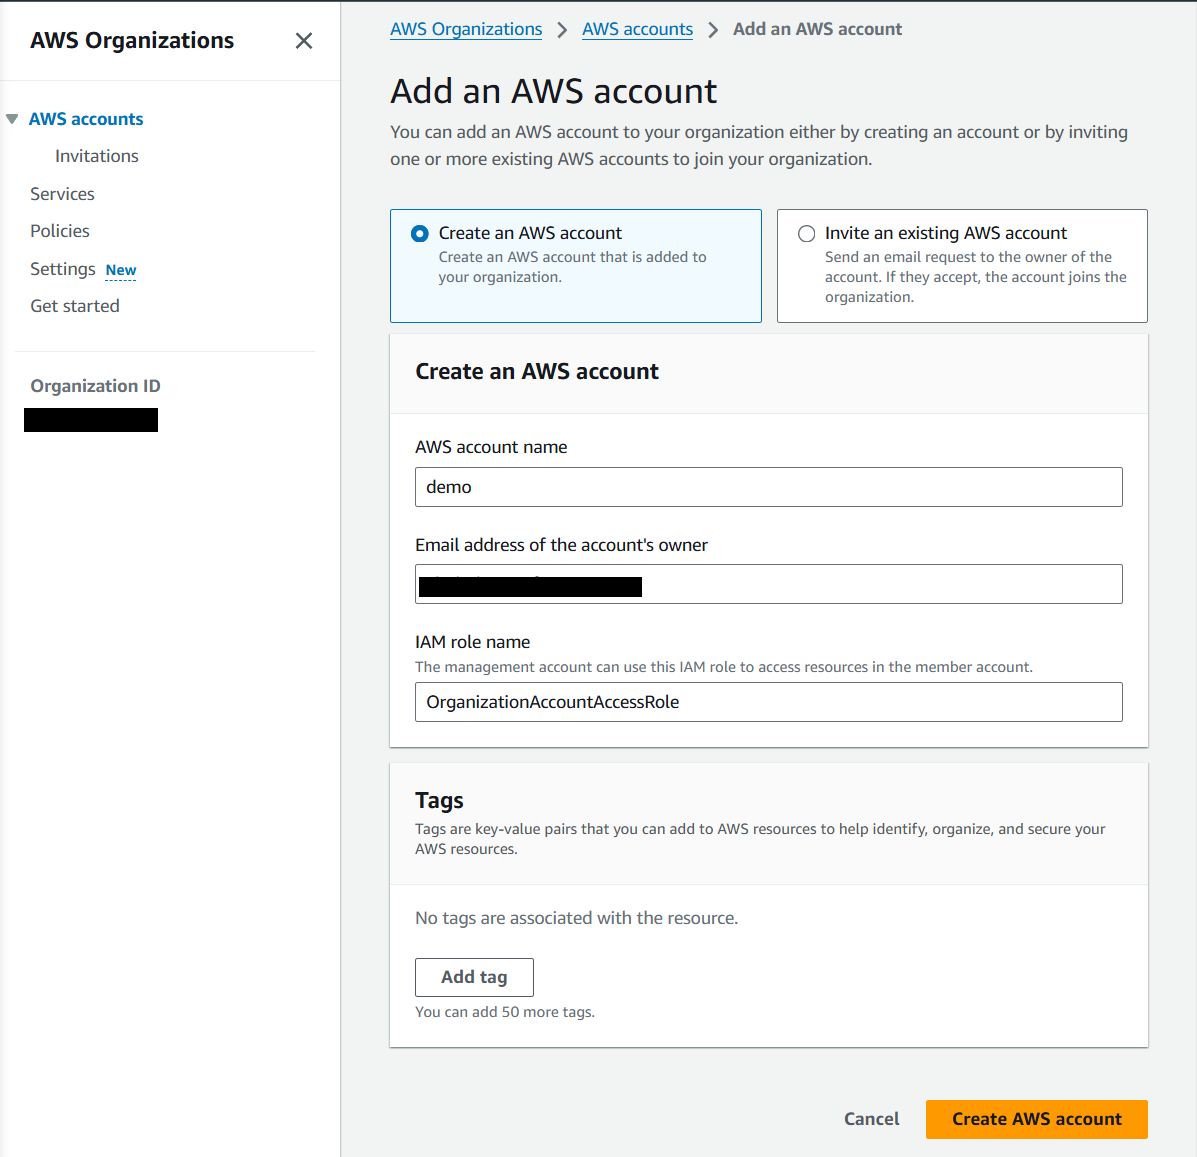
8) Click on "Create AWS account". You will see the message "Your new account should be created within the next few minutes. Check the Pending requests to create accounts page for status." You will get a welcome message to the email provided in the previous step.
9) After a minute or so, click on "AWS accounts" to see that the new account is added to the organization. Let's call it account B2 (in this example, it is called demo).
Invite an AWS account (option 2)
10) Click on "Add an AWS account".
11) Make sure that "Invite an existing AWS account" is selected.
12) Type the email address or account ID of the AWS accounts to invite, and add an invitation email message if needed.
13) Click on "Send invitation".
14) You will see a pending invitation on the "Invitations" page until the invited account accepts it.
Create the organization units and define a hierarchy
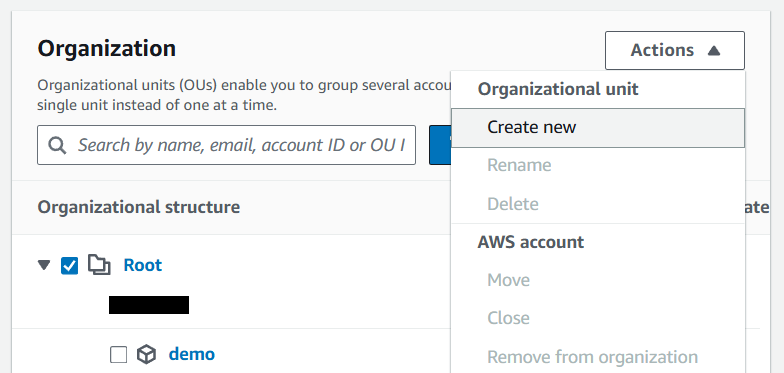
15) Check next to Root and select "Create new" organizational unit under "Actions" dropdown.
16) Type the new organization unit name and click "Create organization unit".


17) Select B2 account (demo) and click on "Move" under the "Actions" dropdown.
18) Select the OU you provided in step #15.
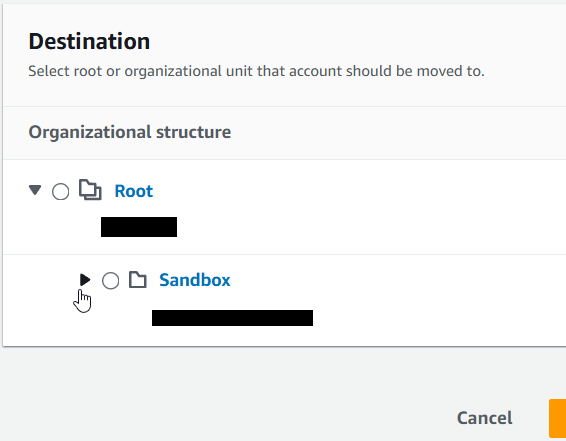
19) Click on "Move AWS account".
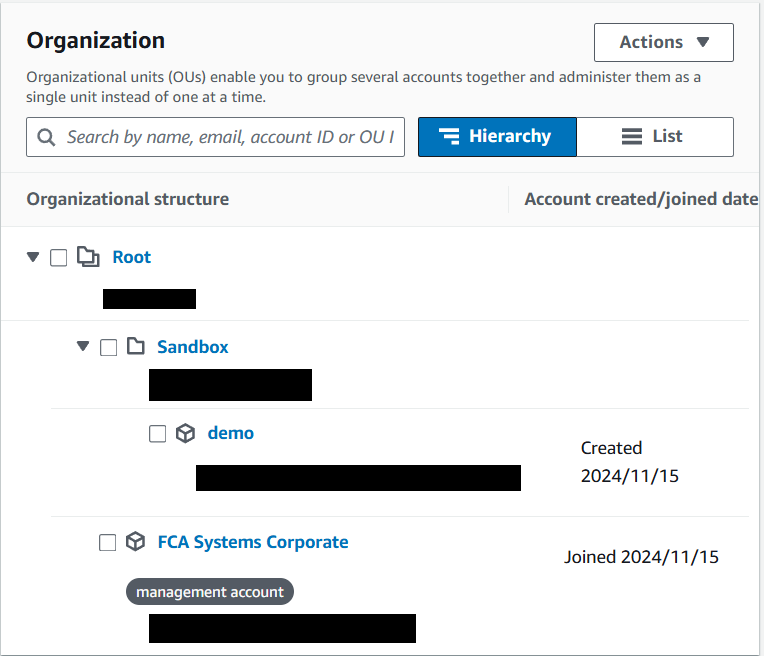
Repeat steps 15-19 for all accounts you want to move within the organization.
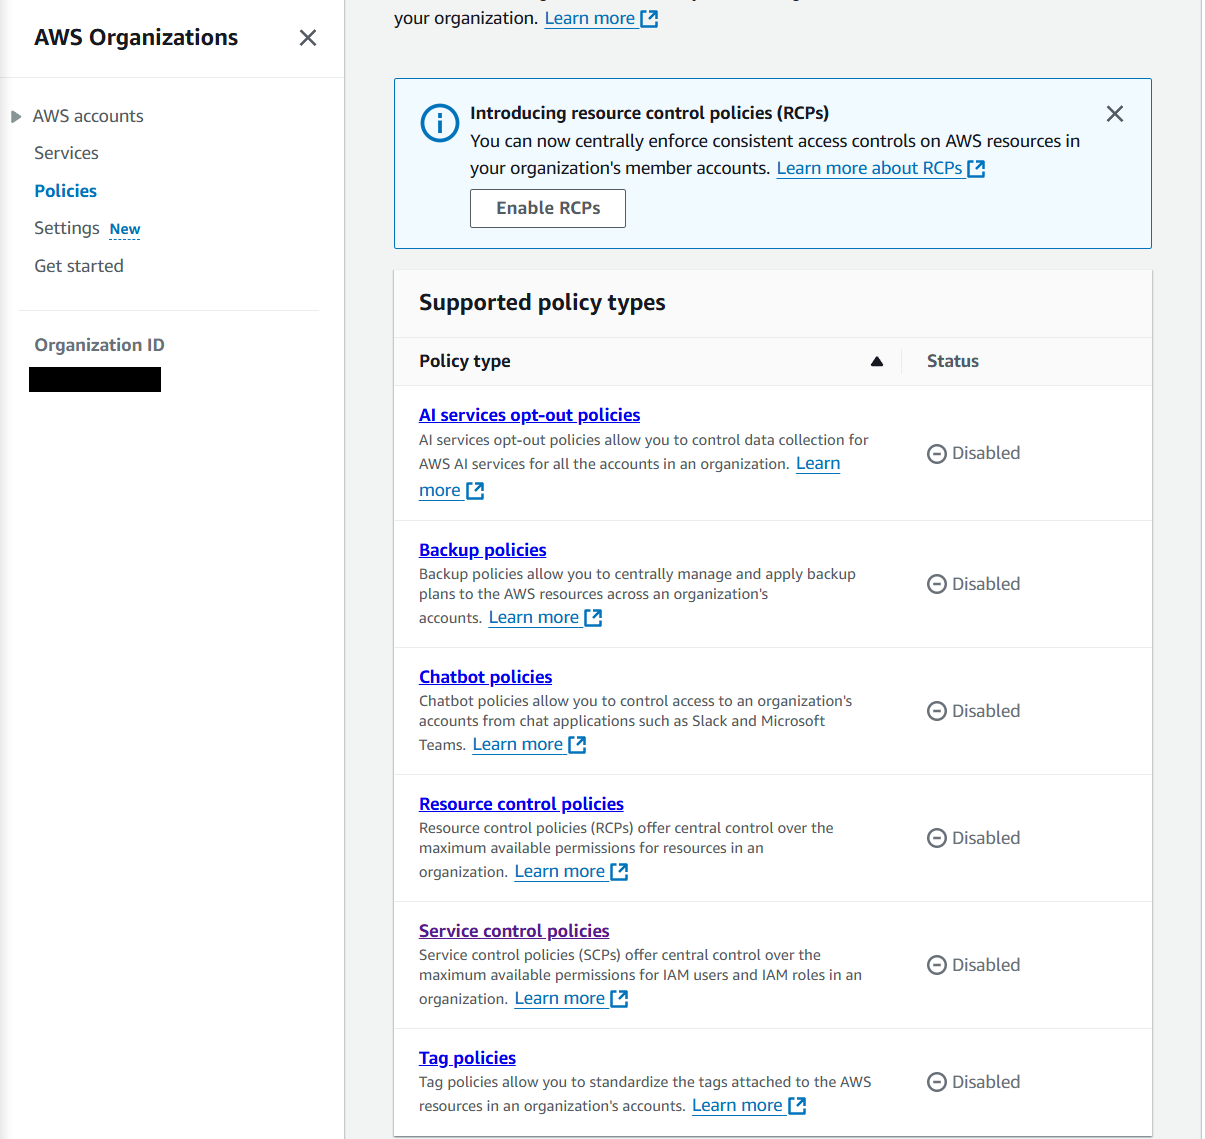
Create the service control policies (SCPs)
Service control policies (SCPs) are a type of organization policy that you can use to manage permissions in your organization. SCPs offer central control over the maximum available permissions for the IAM users and IAM roles in your organization. SCPs help you to ensure your accounts stay within your organization's access control guidelines.
In this example, we will create an SCP that allows all children of "Sandbox" OU to use EC2 services and nothing else.
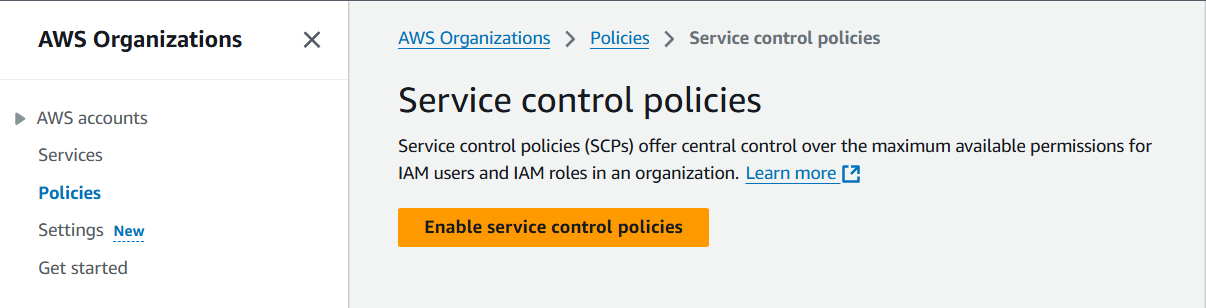
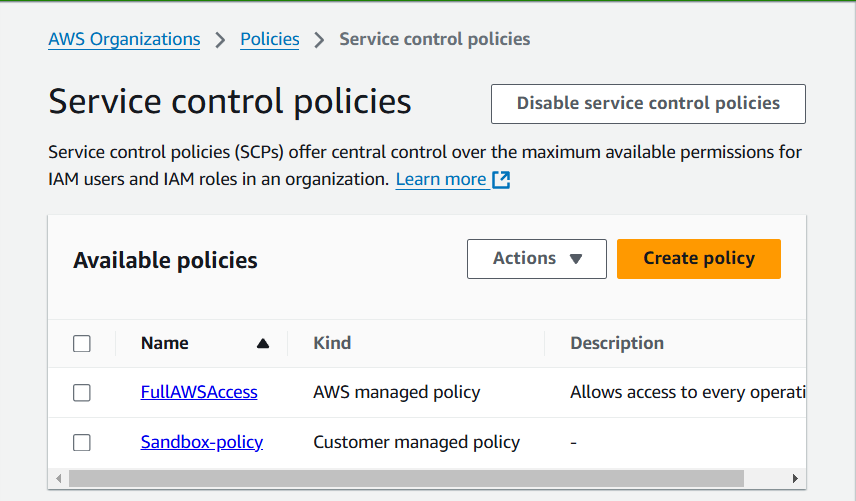
20) Navigate "Policies" and click on "Service control policies".
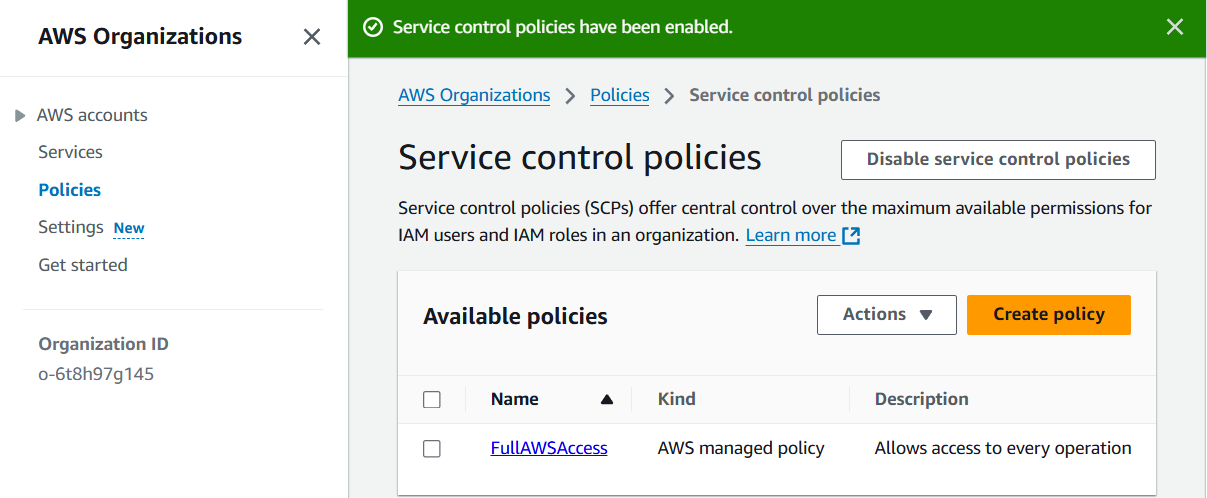
21) Click on "Enable service control policies".
21) Click on "Create policy".
22) Type the policy name, for example, "Sandbox-policy," and add the definition below.
{
    "Version": "2012-10-17",
    "Statement": [
        {
            "Effect": "Allow",
            "Action": [
                "ec2:*",
              ],
            "Resource": [ "*" ]
        }
    ]
}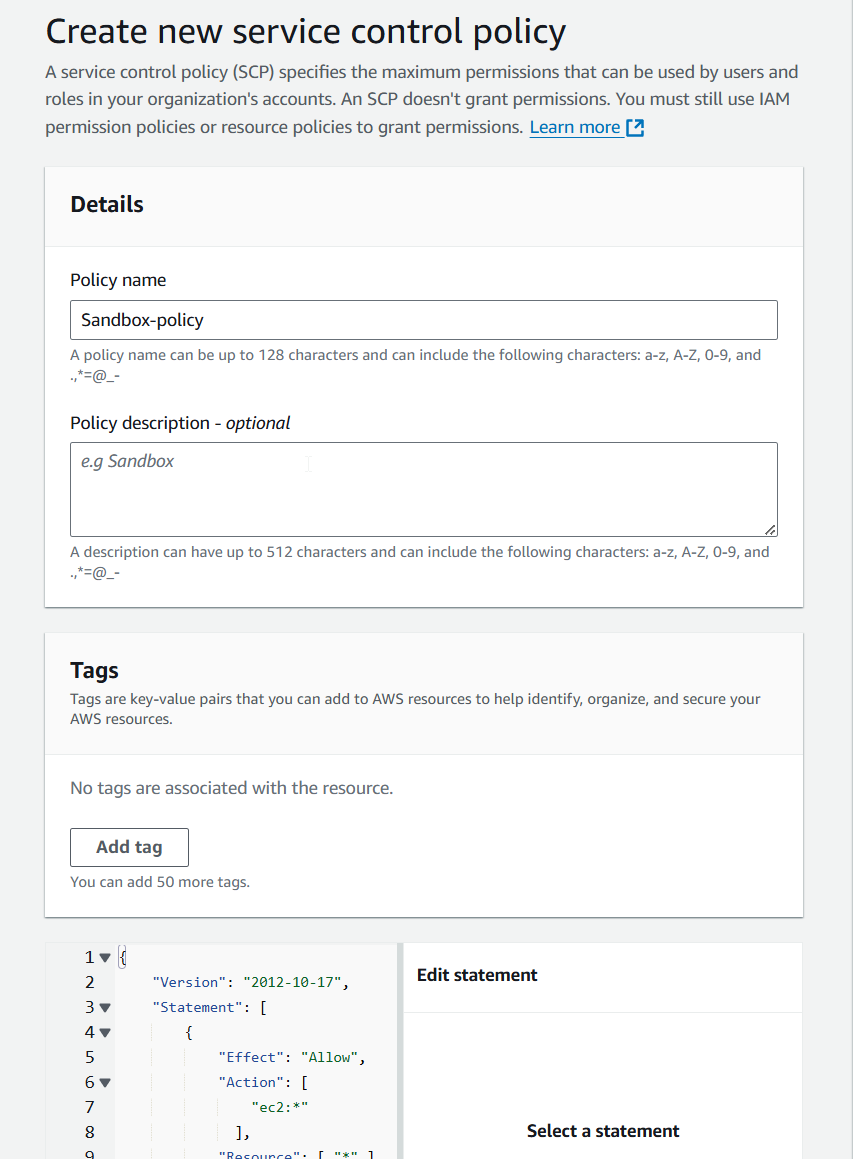
23) Click "Create policy" at the bottom of the page.
24) Go back to your AWS accounts, click on "Sandbox" OU, and then on the "Policies" tab.
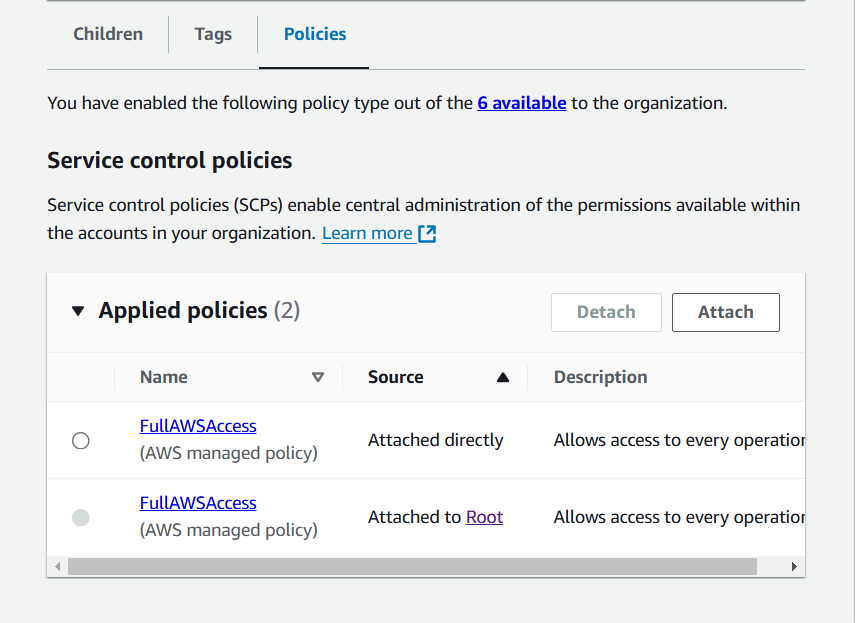
25) Click on "Attach" select "Sandbox-policy" on the one you created in step #22, and then click "Attach policy".
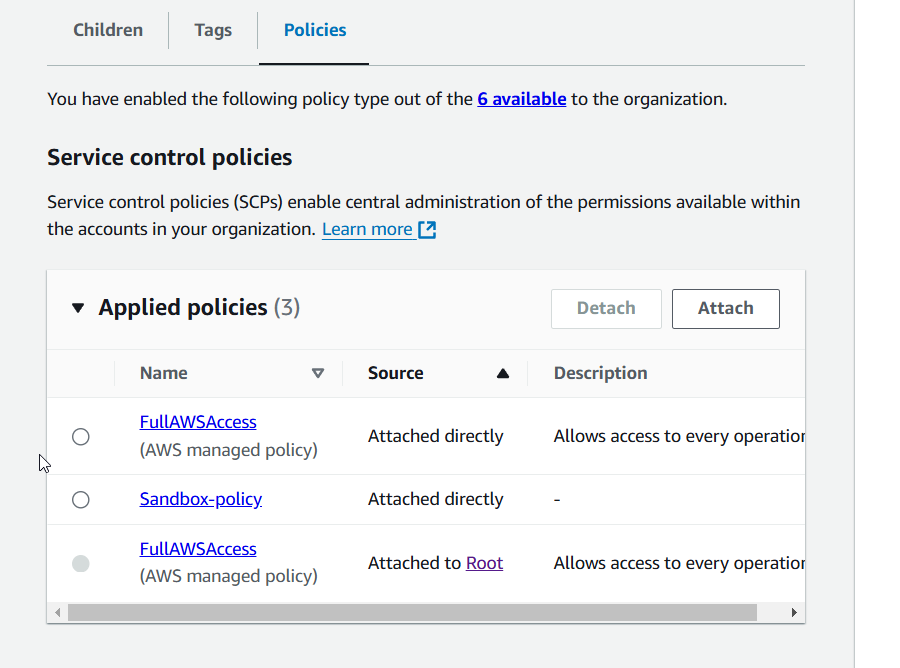
26) (optional) Select the default policy "FullAWSAccess" and click on "Detach" and "Detach policy" on the warning window.
Congratulations! Now, you have a member account under "Sandbox" OU, which is limited to EC2 service. SCP has higher priority over IAM users, so even if your member account has a user with full AWS access, it will be restricted to EC2 as well.
Are you looking for help? Reach me any time.